Your How to make a long cornice board images are available in this site. How to make a long cornice board are a topic that is being searched for and liked by netizens now. You can Download the How to make a long cornice board files here. Find and Download all free images.
If you’re looking for how to make a long cornice board images information linked to the how to make a long cornice board interest, you have pay a visit to the right site. Our website always gives you hints for seeking the highest quality video and image content, please kindly surf and find more informative video content and graphics that fit your interests.
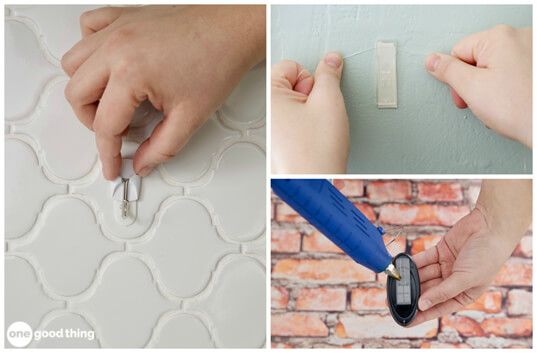
How To Make A Long Cornice Board. Lay the batting on a table counter or floor and then place the cornice board on top front side down. All sealah no sew tapes are. Hot glued a ring onto the back top corner of the board on either side. Miter the ends and front box pieces first.
 Diy With The Joneses Diy Fabric Cornice Board Over French Doors Diy Fabric Cornice French Doors From pinterest.com
The most permanent way of creating a cornice is to sew it to the board. Repeating the process until you reach the corners. We cut a piece of batting out that was larger than the surface to be covered by about 2-3 inches on each edge including the sides this was to give plenty of extra to staple to the backside of the cornice. Miter the ends and front box pieces first. I hope this inspires you to try this project. This thing is so lightweight it doesnt take much to hang it.
As a rule the cornice board must extend 4 inches from the wall.
Wood Screws Spray adhesive not necessary but definitely helpful to have this is the one I use Batting Fabric Staple Gun Scissors. See more ideas about cornice cornice boards window treatments. In this video you will learn how to professionally build and upholster a cornice valance. Determine the correct proportions to make the installation blend with the overall layout of the room. Just 2 small nails will do it. Wood Screws Spray adhesive not necessary but definitely helpful to have this is the one I use Batting Fabric Staple Gun Scissors.
 Source: pinterest.com
Lay the batting on a table counter or floor and then place the cornice board on top front side down. Start stapling the fabric in the center on the top of the board. The most permanent way of creating a cornice is to sew it to the board. Determine the correct proportions to make the installation blend with the overall layout of the room. When we are sure the five boards will make.
 Source: pinterest.com
Its easiest to square up the board then tilt the miter saw to cut a 45-degree bevel for the first end piece and then square it up to cut the second end Photo 2. This thing is so lightweight it doesnt take much to hang it. The ideal height of the front board is 7 inches although some interior designers suggest that it should be 15 of the overall length of the curtain. There is a good old saying measure twice and cut once. As a rule the cornice board must extend 4 inches from the wall.
 Source: pinterest.com
In this video you will learn how to professionally build and upholster a cornice valance. The five boards are laid out on a table to make sure we have made the bottom three 6 boards the same length as the top two 6 boards. How to Make a Fabric-Covered Window Cornice - YouTube. Banding salvage edge was taped with 12 sealah tape and then sewn to complete each panel. The Cornice Board was stapled and padded.
 Source: pinterest.com
The five boards are laid out on a table to make sure we have made the bottom three 6 boards the same length as the top two 6 boards. The five boards are laid out on a table to make sure we have made the bottom three 6 boards the same length as the top two 6 boards. Add an inch or so to the depth and the width of the curtain rod to make sure the cornices will cover everything. You may opt for an open-top. Wood Screws Spray adhesive not necessary but definitely helpful to have this is the one I use Batting Fabric Staple Gun Scissors.
 Source: pinterest.com
Next we measure to make sure they add up to 185. Next iron your fabric then lay it out on your work surface and place the board on top of it. Mar 11 2021 - Explore Carolina Window Designss board CORNICE BOARDS followed by 256 people on Pinterest. Part 1- Building a Cornice Board Part 2 -Covering a Cornice Bo. Add an inch or so to the depth and the width of the curtain rod to make sure the cornices will cover everything.
 Source: pinterest.com
The ideal height of the front board is 7 inches although some interior designers suggest that it should be 15 of the overall length of the curtain. If you want to be able to change it with different fabrics then staple it or tack it to the board. There is a good old saying measure twice and cut once. Hot glued a ring onto the back top corner of the board on either side. When we are sure the five boards will make.
 Source: pinterest.com
Its easiest to square up the board then tilt the miter saw to cut a 45-degree bevel for the first end piece and then square it up to cut the second end Photo 2. See more ideas about cornice cornice boards window treatments. How to Make a Fabric-Covered Window Cornice - YouTube. Hot glued a ring onto the back top corner of the board on either side. What you need to build your cornice board.
 Source: pinterest.com
I hope this inspires you to try this project. If you want to be able to change it with different fabrics then staple it or tack it to the board. Part 1- Building a Cornice Board Part 2 -Covering a Cornice Bo. Cut a piece of batting larger than the cornice board by 2-3 on each edge. See more ideas about cornice cornice boards window treatments.
 Source: pinterest.com
Mar 11 2021 - Explore Carolina Window Designss board CORNICE BOARDS followed by 256 people on Pinterest. Part 1- Building a Cornice Board Part 2 -Covering a Cornice Bo. Start stapling the fabric in the center on the top of the board. Pull the batting to the back and staple trimming the excess as you go. The ball trim at the edge of the shaped cornice was added with sealah no sew 12 inch tape.
 Source: pinterest.com
Start stapling the fabric in the center on the top of the board. Lay the batting on a table counter or floor and then place the cornice board on top front side down. Banding salvage edge was taped with 12 sealah tape and then sewn to complete each panel. The most permanent way of creating a cornice is to sew it to the board. When we are sure the five boards will make.
 Source: pinterest.com
The most permanent way of creating a cornice is to sew it to the board. All sealah no sew tapes are. You may opt for an open-top. In this video you will learn how to professionally build and upholster a cornice valance. The ideal height of the front board is 7 inches although some interior designers suggest that it should be 15 of the overall length of the curtain.
Source: pinterest.com
The mitered corners are glued and nailed together with 1-in. All sealah no sew tapes are. Start stapling the fabric in the center on the top of the board. The mitered corners are glued and nailed together with 1-in. It just takes a little time and patience to get the fabric stretched over.
 Source: ru.pinterest.com
I hope this inspires you to try this project. And thats how to make a cornice board out of foamcore. All sealah no sew tapes are. Its easiest to square up the board then tilt the miter saw to cut a 45-degree bevel for the first end piece and then square it up to cut the second end Photo 2. Just 2 small nails will do it.
 Source: pinterest.com
Pull the batting to the back and staple trimming the excess as you go. It just takes a little time and patience to get the fabric stretched over. Attaching The Cornice to The Wall Above The Window You will want to place the cornice high enough to hide the board from the outside view in the window. Its easiest to square up the board then tilt the miter saw to cut a 45-degree bevel for the first end piece and then square it up to cut the second end Photo 2. Part 1- Building a Cornice Board Part 2 -Covering a Cornice Bo.
 Source: pinterest.com
What you need to build your cornice board. By alternating our joints this way we can build cornice boards up to 20 feet long with very little loss of strength. The most permanent way of creating a cornice is to sew it to the board. Start stapling the fabric in the center on the top of the board. In this video you will learn how to professionally build and upholster a cornice valance.
 Source: pinterest.com
Next we measure to make sure they add up to 185. Its easiest to square up the board then tilt the miter saw to cut a 45-degree bevel for the first end piece and then square it up to cut the second end Photo 2. Just 2 small nails will do it. Repeating the process until you reach the corners. There is a good old saying measure twice and cut once.
 Source: pinterest.com
Determine the correct proportions to make the installation blend with the overall layout of the room. In this video you will learn how to professionally build and upholster a cornice valance. Wood Screws Spray adhesive not necessary but definitely helpful to have this is the one I use Batting Fabric Staple Gun Scissors. Next we measure to make sure they add up to 185. Hot glued a ring onto the back top corner of the board on either side.
 Source: pinterest.com
Start stapling the fabric in the center on the top of the board. Banding salvage edge was taped with 12 sealah tape and then sewn to complete each panel. The most permanent way of creating a cornice is to sew it to the board. This thing is so lightweight it doesnt take much to hang it. Next we measure to make sure they add up to 185.
This site is an open community for users to do submittion their favorite wallpapers on the internet, all images or pictures in this website are for personal wallpaper use only, it is stricly prohibited to use this wallpaper for commercial purposes, if you are the author and find this image is shared without your permission, please kindly raise a DMCA report to Us.
If you find this site serviceableness, please support us by sharing this posts to your preference social media accounts like Facebook, Instagram and so on or you can also save this blog page with the title how to make a long cornice board by using Ctrl + D for devices a laptop with a Windows operating system or Command + D for laptops with an Apple operating system. If you use a smartphone, you can also use the drawer menu of the browser you are using. Whether it’s a Windows, Mac, iOS or Android operating system, you will still be able to bookmark this website.